Operations · Planning
Planning is the forward-looking view of money that hasn't moved yet: scheduled future payments and expected receipts. Invoices and expenses tell you what already happened; Planning tells you what's about to, so the numbers aren't only backward-looking. Anyone managing cash flow needs this to avoid being surprised by an outflow.
Where it is
Top navigation → Finance → Planning tab. Scheduled future payments and expected receipts sit together in one forward view.
What's on the screen
One forward-looking view, with controls along the top and the planned items below:
- Add planned payment — the button that schedules an upcoming outflow.
- Filter — Upcoming (open), to focus on what's still ahead of you rather than items already settled.
- Stats — three figures summarise the outlook: Expected in (€), Planned out (€), and Net planned (€).
- Mark Paid — on a planned item, this confirms it has actually been settled and turns the plan into real accounting (see below).
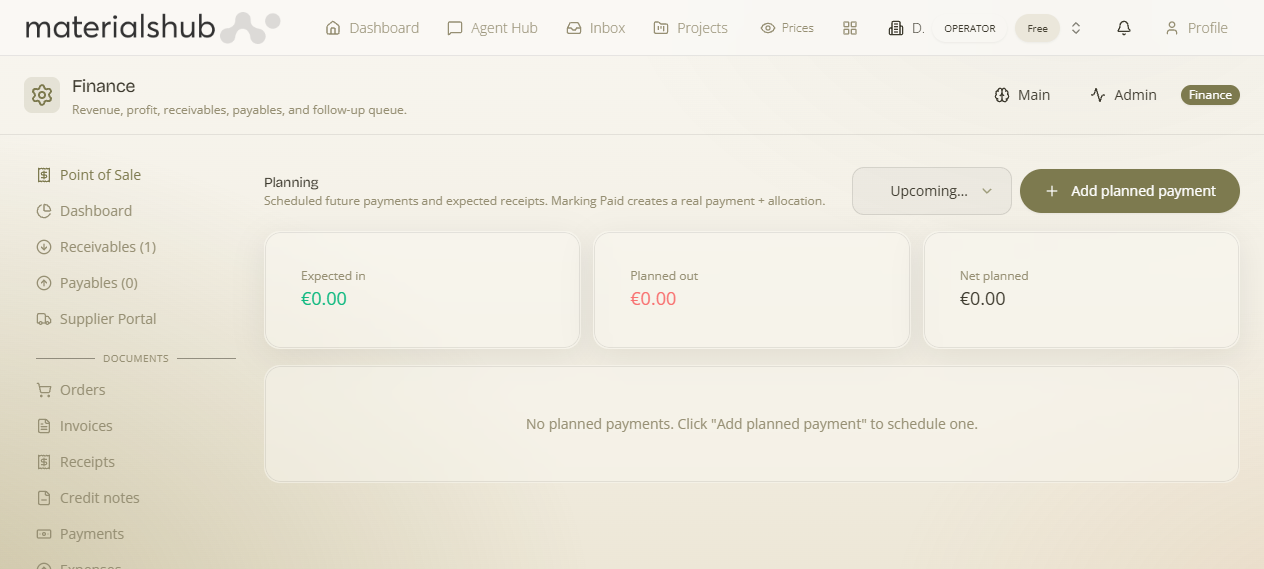
How to schedule a planned payment — step by step
- Open Finance → Planning — scheduled future payments and expected receipts sit in one forward view.
- Click Add planned payment to schedule an upcoming outflow.
- Use the filter (Upcoming (open)) to focus on what's still ahead of you.
- When a planned item is actually settled, mark it Paid — this creates a real Payment record plus its allocation, so the plan turns into actual accounting.
Worked example — a rent outflow due next month. Open Planning → click Add planned payment to schedule the upcoming outflow → leave the Upcoming (open) filter on so it stays in view alongside your other forward items. Watch the Planned out and Net planned stats absorb it. When the rent actually leaves your account, open the item and mark it Paid — it's promoted into a genuine Payment plus its allocation, so it stops being a plan and becomes part of your real cash position.
What it affects elsewhere
Marking a planned item Paid promotes it into a genuine Payment + allocation — so planning data flows through into your real cash position once it's confirmed.