Agent Hub (JARVIS)
The Agent Hub is the conversational AI studio at the centre of the platform. Instead of clicking through menus, you describe what you want in plain language and the assistant searches, creates and automates across every module. Substantial results — products, renders, sheets, staged rooms, VR worlds — open as artifacts on a canvas with the chat docked to a collapsible right rail, so you can work on results, not just read them. This guide teaches each part: starting a conversation, choosing an agent, using the composer, the studio canvas, and turning results into real artefacts you can keep.
How to open it: top navigation → Agent Hub.
The fastest path to value. Almost everything below starts the same way: open the Hub, pick an agent, type what you want. You rarely need to know which tool does the job — describe the outcome and the assistant chooses. Read on to understand each capability and what it produces.
1. Starting a conversation
What it is — a conversation is a single chat thread with the assistant. Each thread remembers everything said in it, so you can keep refining a request without repeating yourself. Why it matters — context is what makes the assistant feel like an expert colleague rather than a one-shot search box: ask a follow-up like “now make them all darker” and it knows which products you mean.
How to start one
- Open Agent Hub from the top navigation.
- Click New Conversation to begin a fresh thread.
- Pick an agent above the composer (see step 2).
- Type your request in plain language and send it.
- To return to earlier work, reopen any past conversation from the list on the left — it picks up exactly where you left off.
Your past chats live in a conversation manager you open with ⌘K (a command-palette style modal) — search, reopen, rename or delete any thread from there. Moving conversations into ⌘K keeps the main screen clear for the canvas and the current chat.
What it affects elsewhere: start a new conversation for a new topic so contexts don't bleed into each other; keep one thread going when you're iterating on the same task.
2. Choosing an agent
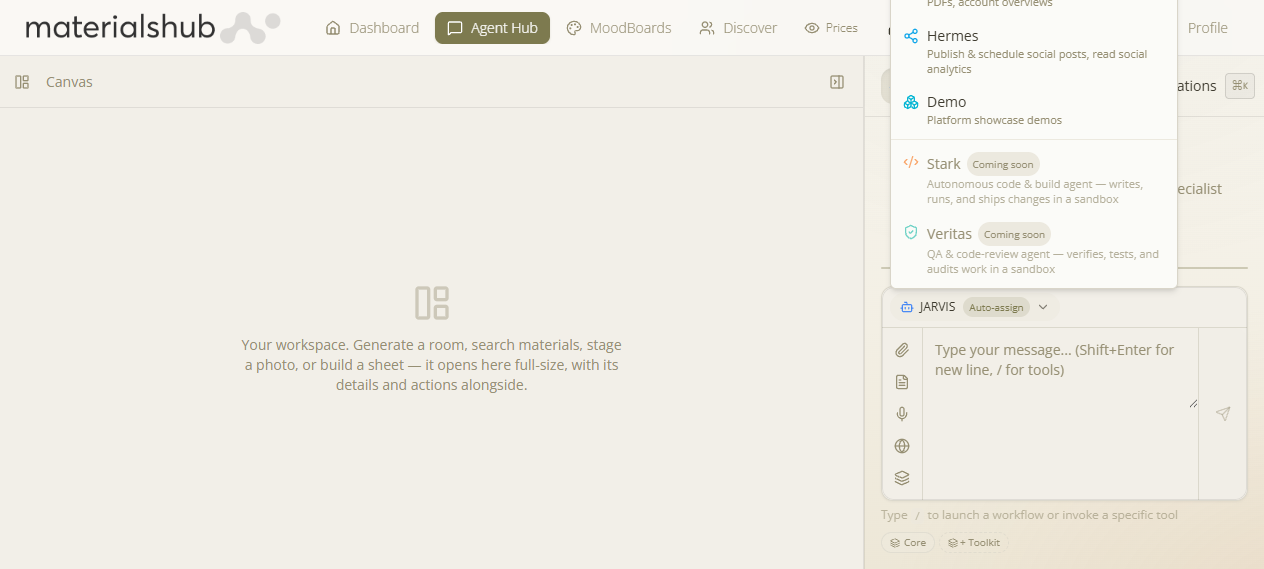
What it is — the agent selector sits directly above the composer and lets you pick which assistant handles the conversation. Why it matters — the agents share the same chat surface and tools but differ in focus, so picking the right one shapes the assistant's framing and default behaviour for that thread.
- JARVIS (Auto-assign) — the default orchestrator: it auto-routes your request to the right specialist, and handles anything general itself. The right choice for almost everything.
- Specialists — Vision (design/3D), Pepper (catalogs & research), Edith (SEO & visibility), Trinity (finance & quotes), Hermes (social), and Demo (showcase). Pick one to stay in a single lane.
You can start different conversations with different agents. For a full breakdown of each agent and exactly when to use it, see AI Agents.
Tip: not sure which to pick? Leave it on JARVIS and let it route. Switch to Vision for a full design session or Trinity for a quoting session when you want a focused thread.
3. The composer
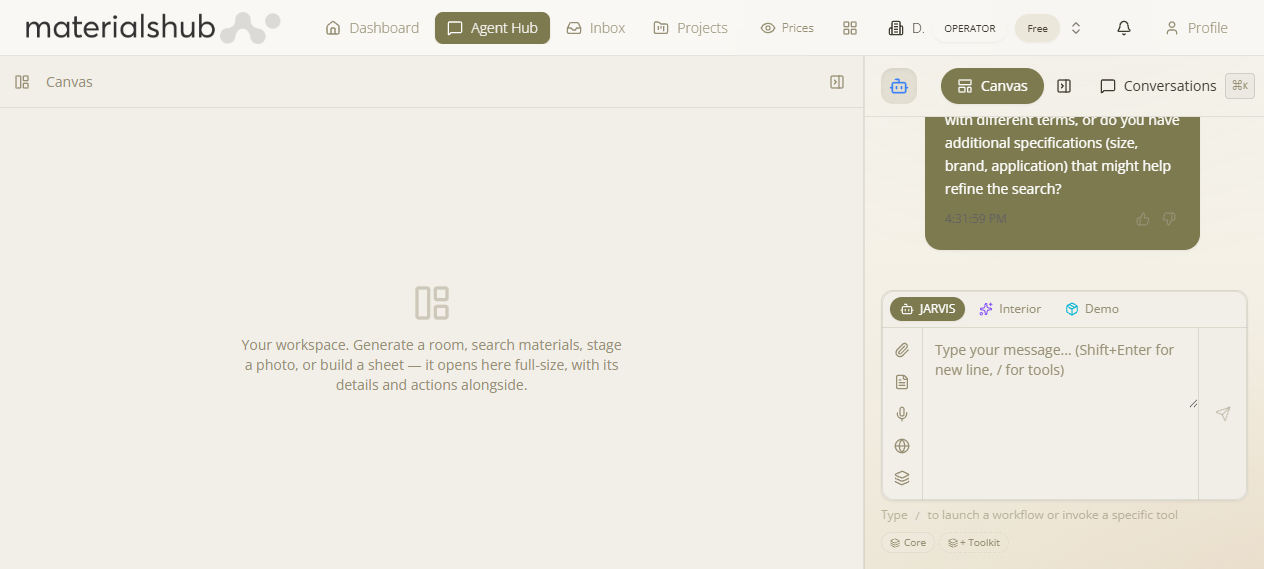
What it is — the message box and its toolbar, where you write requests and attach context. Why it matters — the toolbar is how you give the assistant more than words — a room photo, a document, your voice, or a web page to learn a style from — which makes its answers far more precise.
What the toolbar offers
- 📎 Attach — add images (e.g. a room photo or material sample) for the assistant to analyse.
- 📄 Document — attach a document for context.
- 🎤 Voice — dictate your message instead of typing.
- 🌐 Inspiration URL — paste a web page; the assistant extracts its palette, materials and style and finds matching products.
- Core / + Toolkit — the assistant's available tool set; the toolkit expands as your plan/role unlocks more.
How to write a good request
- Describe the outcome in plain language — for example, “find 5 cement-based grey tiles for a modern bathroom”.
- Add context where it helps: attach a room photo, attach a document, or paste a web page via the inspiration-URL globe button to match its palette, materials and style.
- Use Shift+Enter to insert a new line within a message; press Enter to send.
The “/” tools menu
Type / in the message box to open the tools menu and launch a workflow or invoke a specific tool directly, rather than relying on the assistant to choose. This is useful when you know exactly which capability you want. More tools can be enabled from the toolkit panel.
What it affects elsewhere: the full catalogue of what the assistant can do — and how to enable additional toolkits — is documented in Tools & Capabilities.
4. The Studio canvas, inspector & right-rail chat
What it is — the Agent Hub works like a studio: when the assistant produces something substantial — a set of products, a moodboard sheet, an interior render, a staging result, a VR world — it opens as an artifact on a canvas, and the chat automatically docks to a collapsible right rail. Why it matters — your work has room to breathe: the render/products/sheet gets the main stage while the conversation that's driving it stays alongside, instead of everything scrolling away up a chat log.
How it lays out
- Canvas — the main area, holding the current artifact. Multiple artifacts from a conversation appear as chips you switch between, so each result lives in exactly one place (no more triplicated cards).
- Contextual inspector — a panel beside the artifact whose controls match what's selected: a products inspector for a product set, a sheet inspector for a moodboard sheet, a staging / render / world / board inspector for those. It's where you act on the artifact (refine, save, tweak).
- Right-rail chat — the conversation docks to the right while you work. You can collapse the chat to focus the canvas, or hide the canvas to reclaim a full-width chat — whichever the moment needs.
- Design canvas — starting a new design or a virtual staging opens a guided design canvas for that flow.
How to work through it
- Send your message; substantial results open on the canvas (simple answers stay inline in the chat).
- Use the inspector beside the artifact to act on it — open a product, save an image to a moodboard, adjust a sheet.
- Switch between a conversation's artifacts with the chips; collapse the chat or hide the canvas as needed.
- Chain follow-ups in the same thread to refine — the assistant keeps the conversation's context, and new results land on the canvas.
5. Turning results into real artefacts
What it is — many chat actions don't just display in the thread — they create real objects that live in their own module. Why it matters — a moodboard sheet, a tracked price/mention subject, or a generated image you make in chat is findable later outside the conversation, so the chat becomes a way to do work, not just talk about it.
- A generated image or a chat product can be promoted into a moodboard (a copy is kept so it survives even if the chat is deleted).
- A presentation sheet you produce attaches to a moodboard and appears in that module.
- A price or mention you ask the assistant to track becomes a tracked subject in the relevant monitoring module.
Credits: chatting and searching are inexpensive; explicit generation actions (images, presentation sheets, scans, 3D/VR) consume credits, and the assistant tells you the cost when an action is metered. See Account & Billing.
Where results go: because actions create real artefacts that also appear in their own module, treat the Agent Hub as the front door to the whole platform — start here, and find the finished work in Moodboards, Projects, Finance and the monitoring modules later.
6. Deep-linking & preloading the assistant
What it is — the Agent Hub can be opened from anywhere — another page, a button, an email, a chat message — with the conversation pre-loaded and even auto-started, by adding parameters to the /agent-hub URL. Why it matters — it turns “open the assistant and explain what you want” into a single click: a product page can launch “test this material on a room”, an email can drop a customer straight into a guided flow, and an internal button can pre-attach a photo and fire an edit. You don't have to retype or re-attach anything.
The parameters
| Parameter | What it does |
|---|---|
?agent= | Pick the agent/mode — kai (JARVIS), interior-designer or demo. |
?prompt= | Pre-fill the message box with this text — and, on its own, auto-send it. |
?image=<url> · ?images=a,b,c | Preload one or more real chat attachments into the composer (comma-separated for several) — the image(s) the generation pipeline acts on. |
?generation_mode=<mode> | Force the generation pipeline — e.g. image-edit, redesign, floor-plan-render. |
?quickstart=<toolkitId>:<label> | Launch a specific guided flow deterministically — e.g. generation:Test on a room, presentation-sheets:Material board, seo-research:Research a keyword. (Split on the first colon, so the label may itself contain colons.) |
?conversation= | Open a specific existing conversation. |
?moodboard= | Set the moodboard context (so results can be added to that board, and the context survives a reload). |
?pinned_product_id= (+ pinned_product_name, pinned_product_image) | Pre-pin a material so an interior flow already knows which product to apply (this is what a product's “Test on a room” button uses). |
How they combine
- The launch waits for a seeded image to finish attaching before firing the flow, so a generation form's image field is already filled in when it opens.
- An explicit
quickstartsuppresses the freeform prompt auto-send — the guided flow drives the interaction instead of a one-shot message. - Permissions still apply server-side. A deep-link can't reach a tool your role isn't allowed to use — RBAC is enforced on the server, so a crafted URL can't escalate to admin-only capabilities.
Examples
- Edit a photo from any page —
/agent-hub?agent=interior-designer&image=<roomURL>&generation_mode=image-edit&prompt=Apply warm oak flooring→ the photo is attached, the mode is set, the prompt auto-sends, and the agent edits it. - Open a guided flow preloaded —
/agent-hub?quickstart=generation:Test on a room&image=<roomURL>→ opens the “Test on a room” capture with the photo already in place. - Jump straight to a tool —
/agent-hub?quickstart=presentation-sheets:Material board(opens the sheet wizard) or/agent-hub?quickstart=seo-research:Research a keyword.
Note — “flows” here means the assistant's guided flows, reached via ?quickstart= (every form / run / generation / sheet-wizard / modal flow is reachable this way). This is not the automation Flows engine (events / webhooks / schedules) — that's a separate subsystem and isn't triggered by these URL parameters.