Free Tools
The Tools hub is a small set of utilities for sourcing, pricing and specifying materials — useful on their own, and a friendly on-ramp to the rest of the platform. This guide teaches every tool one by one: what it is, why it matters, exactly how to run it, how to read the result, and what it connects to elsewhere. Four of the tools are public and need no login; two more (the Catalog tools) appear once you sign in. Every tool here is also available inside the Agent Hub assistant, so you can run the same calculations and scans by just asking in plain language.
How to open it: the free tools are public — open /tools (no sign-in required). When you're signed in, the same hub also lists Catalog tools, and you can reach it from your Profile menu → Tools.
Two kinds of tool, two behaviours. The calculators (Heat-pump sizer, Heating cost comparison) run entirely in your browser — instant, unlimited, no bot check. The web scans (Price scan, Mention scan) reach out to real, paid sources on every run, so they're protected by a small daily allowance, a quick bot check, and short-term caching (see Fair use & limits). Knowing which kind you're using explains why one is unlimited and the other has a counter in the header.
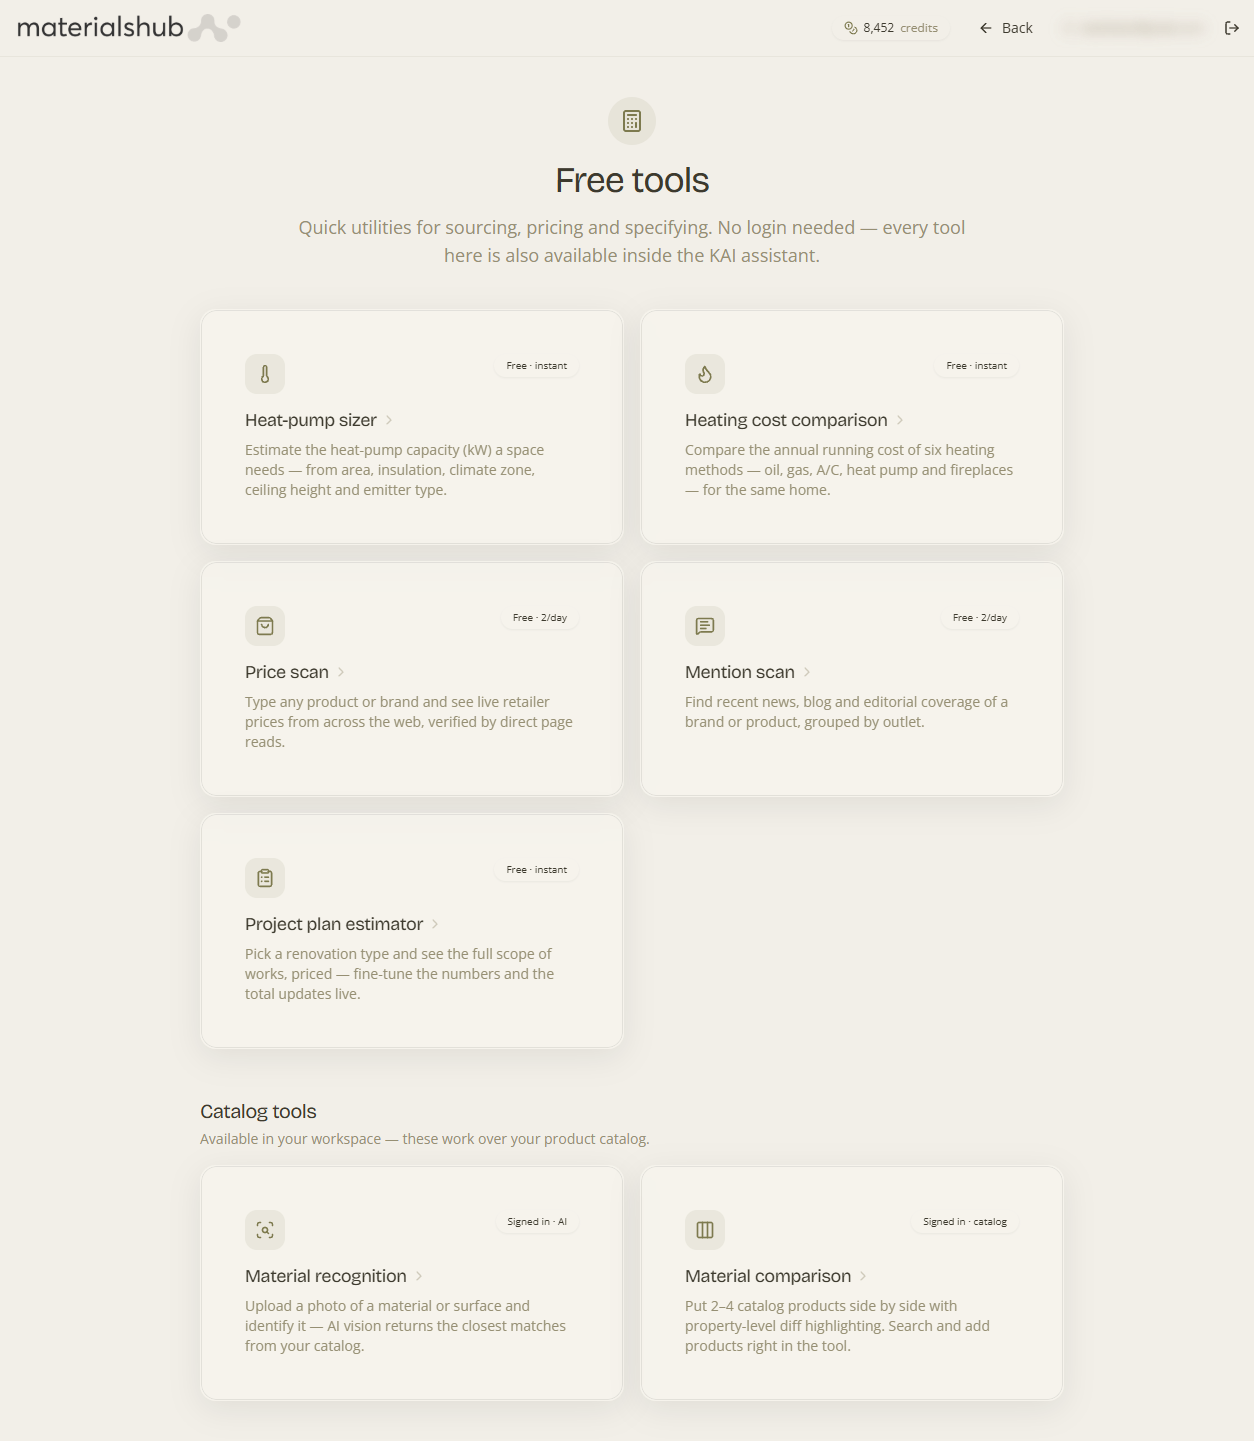
/tools — a card per tool, each linking to its own page.1. What's in the hub
What it is — a landing page with one card per tool, grouped by kind. Why it matters — the grouping tells you up front which tools are free-and-instant and which consume your daily scan allowance, so there are no surprises. The four public tools split into two kinds:
- Instant calculators — the Heat-pump sizer and Heating cost comparison. These run entirely in your browser, update live as you type, and have no daily limit and no bot check.
- Live web scans — Price scan and Mention scan. These call real sources across the web, so they're protected by a small daily allowance, a quick bot check, and short-term caching of identical queries (see Fair use below).
- Project plan estimator — at /tools/project-plan: a value-first, fully editable estimator. It leads with a Full Home Renovation and shows the whole priced scope of works up front — “Free, instant, no sign-up to try.” You enter the measurements, then edit rows, add tasks, change units, and drop in whole sections from the library, watching the price update. Save & create free account keeps your plan and imports it into your workspace after sign-up. (Other project types prompt sign-up; figures are a ballpark using standard rates.) It's the public on-ramp to the full Plan & Estimating engine.
You don't need an account to use any of them. The header shows your remaining free scans for the day; signing in raises the limit and unlocks ongoing, tracked monitoring with alerts.
What it unlocks when signed in: the hub adds a third group — Catalog tools — which work against your workspace catalogue (so they require a login): Material Recognition and Material Comparison (see section 6).
2. Heat-pump sizer
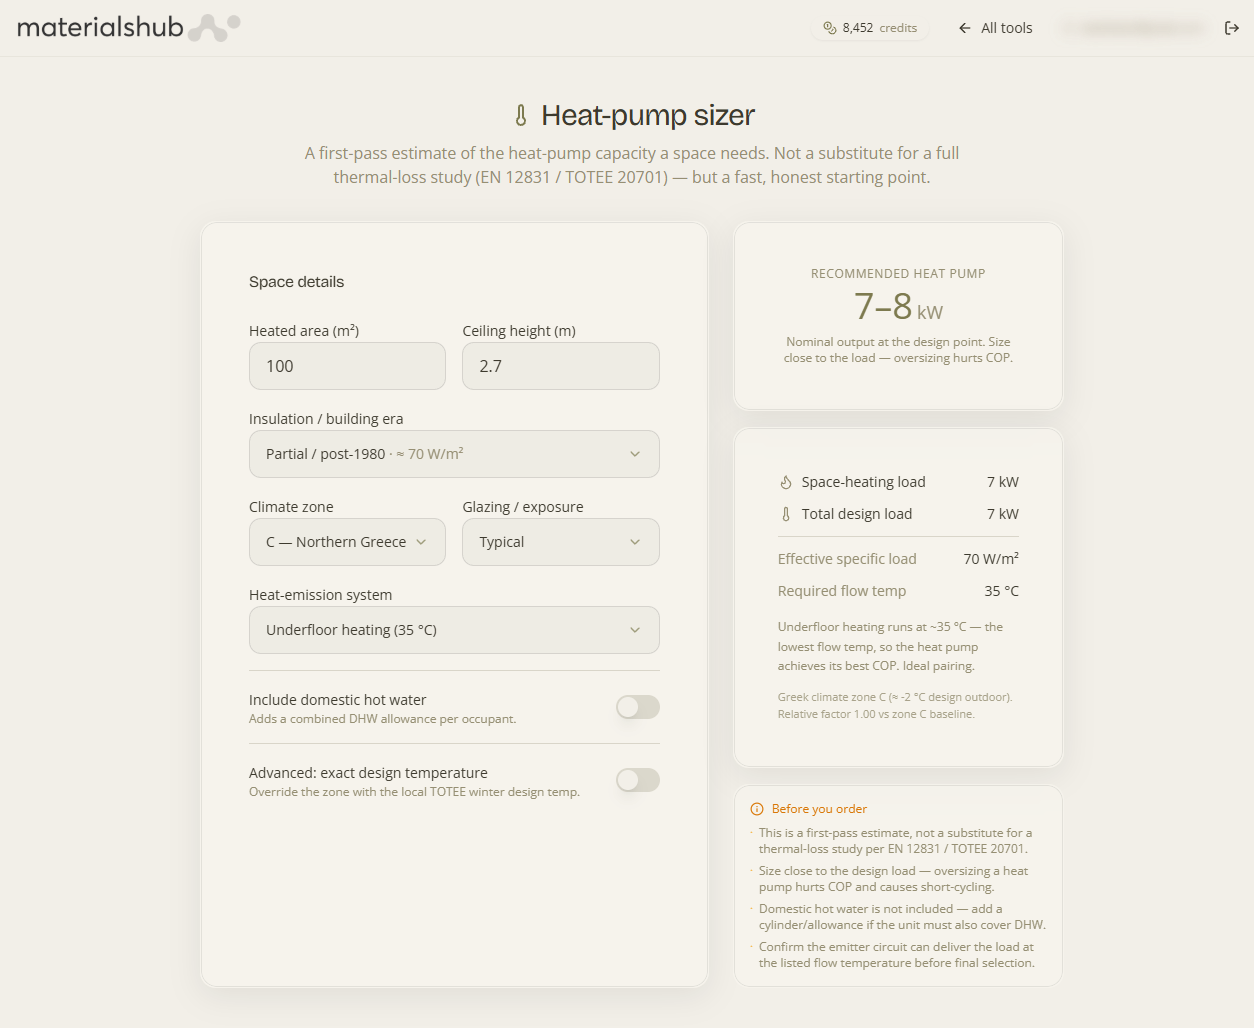
What it is — a first-pass estimate of the heat-pump capacity (in kW) a space needs. Why it matters — it lets specifiers and homeowners sanity-check a supplier's quote before committing — a quick reality check on whether a proposed unit is roughly the right size. It runs live in your browser: the result updates instantly as you type, there's no quota, and nothing is sent to a server.
How to run it
- Enter the heated area (m²) and ceiling height (m) — together these give the heated volume.
- Pick the insulation / building era — anywhere from no insulation through to passive-house / nZEB.
- Choose the climate zone (warmest to coldest), or open advanced to type the exact winter design temperature instead.
- Set the glazing / exposure — how much window area and exposed wall the space has.
- Choose the heat-emission system (underfloor, fan coils, low-temp radiators or existing radiators) — this sets the required flow temperature.
- Optionally enable domestic hot water for a chosen number of occupants to add the hot-water load.
The inputs
| Field | Notes |
|---|---|
| Heated area (m²) | Floor area of the space being heated. |
| Ceiling height (m) | Used with the area to derive the heated volume. |
| Insulation / building era | From no insulation through to passive-house / nZEB. |
| Climate zone | e.g. Zone C — Northern Greece. |
| Glazing / exposure | e.g. Typical — how much window area and exposed wall the space has. |
| Heat-emission system | e.g. Underfloor heating 35 °C — sets the required flow temperature. |
| Include domestic hot water | Toggle — adds hot-water load for a chosen number of occupants. |
| Advanced: exact design temperature | Override the climate zone with a precise winter design temperature. |
How to read the result
The result shows a recommended capacity range (kW), the space-heating and (if included) hot-water loads, the effective specific load (W/m²), the flow temperature your chosen emitter needs, and notes on how that choice affects efficiency. It also lists the assumptions behind the figure, so you can see what's driving the number rather than treating it as a black box.
This is a coarse planning estimate, not a substitute for a full thermal-loss study (EN 12831 / TOTEE 20701). Always have a professional confirm the load before ordering — and size close to it, since oversizing a heat pump hurts efficiency.
3. Heating cost comparison

What it is — a side-by-side comparison of the annual running cost of several heating options for the same home. Why it matters — it answers the practical question a buyer actually has — "which way of heating this place is cheapest to run?" — and shows how much more each alternative costs. Like the sizer, it runs live in your browser with no daily limit.
How to run it
- Enter the home's area (m²).
- Enter its energy intensity (kWh/m²·yr) — take this from an energy performance certificate.
- Adjust the unit prices for electricity, gas, oil and wood to match your tariffs.
- Set the heat-pump COP (efficiency figure) and the A/C type.
The inputs
| Field | Notes |
|---|---|
| Area (m²) | Floor area of the home. |
| kWh/m²·yr | Annual heat demand intensity, taken from an energy performance certificate. |
| Electricity €/kWh | Unit price of electricity. |
| Gas €/kWh | Unit price of gas. |
| Oil €/L | Unit price of heating oil. |
| Wood €/kg | Unit price of wood. |
| Heat-pump COP | Coefficient of performance (efficiency figure) of the heat pump. |
| A/C type | e.g. Inverter COP 3. |
How to read the result
The tool ranks the methods by yearly cost, highlights the cheapest, and shows how much more each other option would cost over a year — so the trade-off is visible at a glance.
The comparison covers running cost only — it excludes the price of the equipment, installation and maintenance. Use it to weigh ongoing fuel/energy spend, not total cost of ownership.
4. Price scan
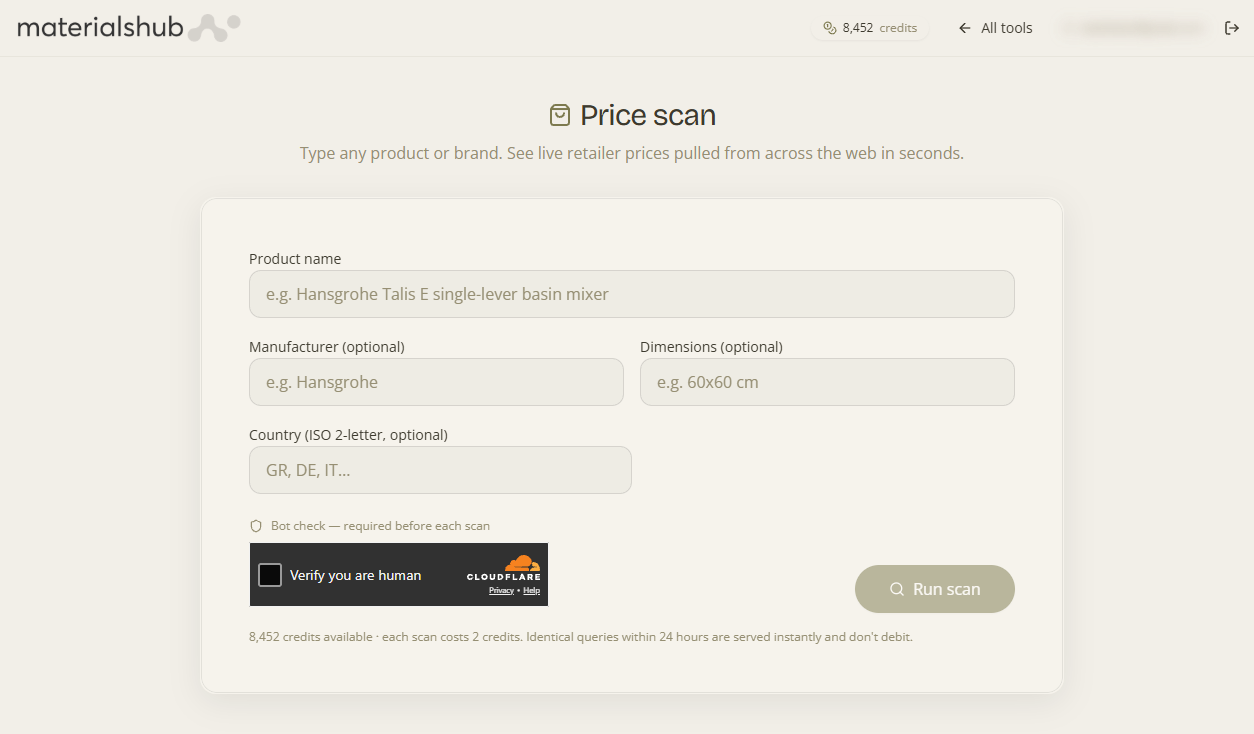
What it is — type any product or brand name and get back real retailer prices from across the web. Why it matters — it tells you the going rate for an item in seconds, so you can benchmark a supplier quote or your own pricing against the live market. The scan searches multiple shopping sources and reads product pages directly to verify the price, then summarises the result as lowest, median and highest.
How to run it
- Type a product or brand name into the search box.
- Clear the quick bot check if prompted (mostly invisible).
- Run the scan — it typically takes a few seconds and returns several retailers. (This counts against your daily allowance unless it's a recently-cached query.)
How to read the result
The top of the result summarises the market as lowest / median / highest. Each row beneath shows the retailer, the live price (with any was/now discount), stock availability, a "verified" mark where the price was confirmed by a direct page read, and a link straight to the listing. Trust verified rows most; use lowest/median/highest to judge where a given quote sits.
What it leads to: this is a free taste of the platform's full price monitoring. Once you sign in you can keep tracking a product over time and be alerted to price drops, new retailers and promotions, rather than running a one-off scan. See Tools & Capabilities for what the assistant can do with tracked pricing.
5. Mention scan
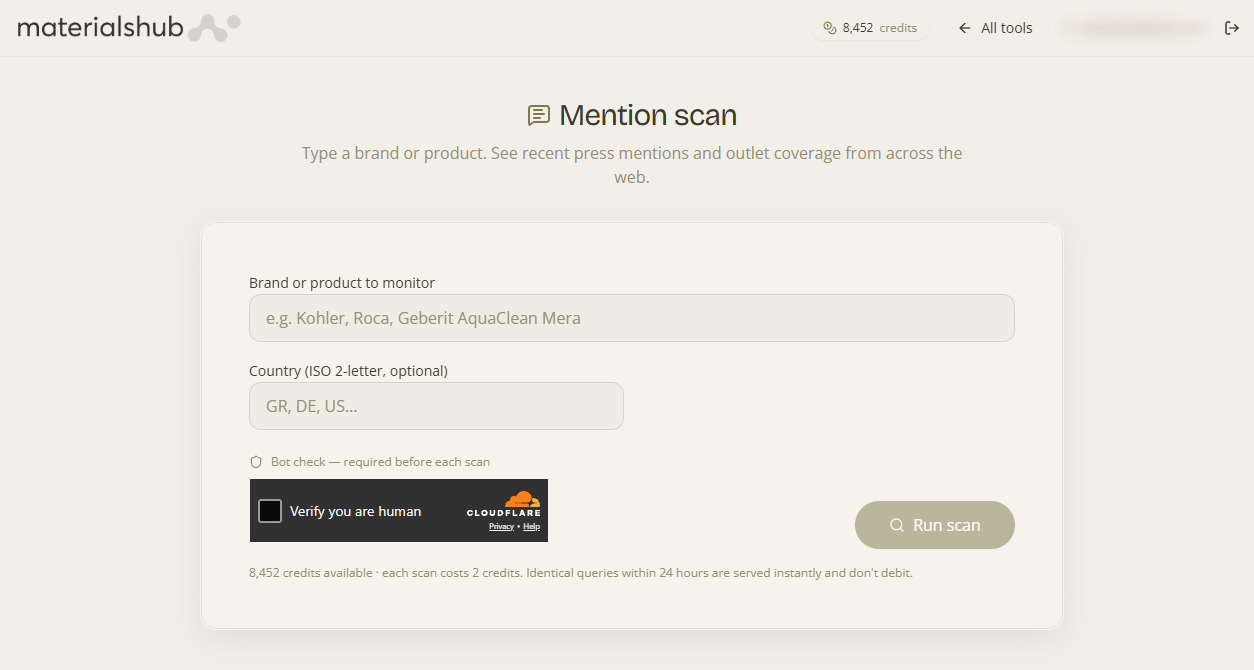
What it is — enter a brand or product and see recent press mentions — news, blogs and editorial coverage from the last 30 days — together with the top outlets talking about it. Why it matters — it gives you a fast read on a brand's current visibility and reputation, useful for vetting a supplier or watching your own coverage.
How to run it
- Type a brand or product name into the search box.
- Clear the quick bot check if prompted.
- Run the scan — it returns recent coverage plus the outlets covering it most. (Counts against the same shared daily allowance as the price scan, unless cached.)
How to read the result
Each result shows the headline, a short excerpt, the outlet, the publish date and a link to the article. The top outlets panel tells you who is driving the conversation — concentrated coverage in a few reputable outlets reads differently from scattered mentions.
What it leads to: it's a preview of the platform's mention monitoring. Signing in lets you track a subject continuously and get alerted to spikes in coverage, negative sentiment from reputable outlets, and brand-new outlets picking up the story — instead of a single snapshot. The same capability is available to the assistant in Tools & Capabilities.
6. Catalog tools (signed in)
What it is — a third group that appears in the hub once you're logged in. Why it matters — unlike the public tools above, these work against your workspace catalogue (and the AI vision/search backend), so they require an account and open their own dedicated screens rather than a /tools/<slug> page. They were previously reachable only by typing the URL — now they're grouped here and in the Profile → Tools menu.
- Material Recognition Signed in · AI — drop in a photo and identify the material, its attributes, and matching catalogue products. Opens Material Recognition (/recognition).
- Material Comparison Signed in · catalog — put materials side by side to evaluate them. Opens Material Comparison (/compare).
These are kept separate from the free public tools so the "no login needed" promise still holds for the public utilities. The free scans show your remaining daily allowance in the header; Catalog tools simply require being signed in.
7. Fair use & limits
What it is — the light guards on the two web scans. Why it matters — the price and mention scans call real, paid sources on every run, so these rules keep the free service sustainable and abuse-free while staying out of your way:
- Daily allowance — a small number of free scans per visitor each day, shared across both scan types. The header badge shows how many you have left, and the count resets daily.
- Bot check — a quick, mostly invisible challenge before a scan runs, to keep automated abuse out.
- Caching — if someone recently ran the exact same query, you get the cached result instantly, and it doesn't count against your allowance.
The instant calculators (heat-pump sizer, heating cost) have no limit or bot check — they don't touch a server.
Want more than a snapshot? When your free scans run out you'll be offered a free account (which raises the daily quota and lets you save and track scans over time, with alerts) or pay-as-you-go credits. Tracked, ongoing monitoring lives inside the platform — start in the Agent Hub, where the assistant can set up and manage it for you.