CRM · Users
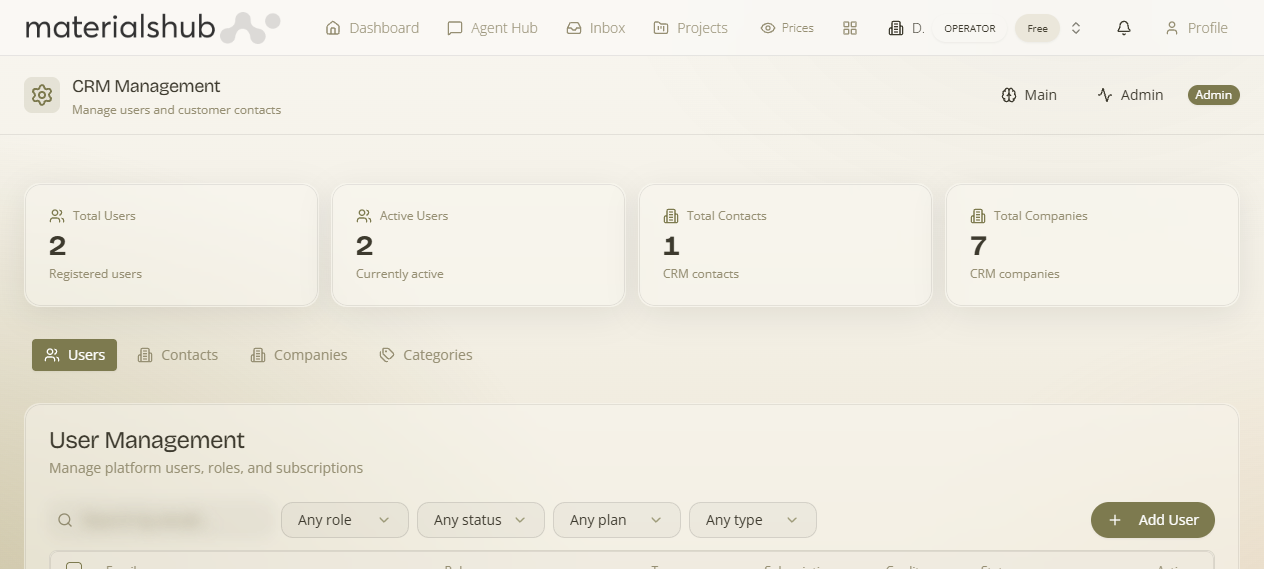
The Users tab is where you manage the platform users in your workspace — the people who actually have a login. It lists each user alongside their role, subscription tier and credit balance, so the access and spend of every account is visible at a glance. This is the tab you use to keep access correct: a user's role is the gate on what they can see and do across the platform, and the subscription and credit columns tell you what each account can spend.
Where it is
Top navigation → CRM → the Users tab (the first of the four CRM tabs: Users, Contacts, Companies, Categories).
Users vs. Contacts — a user has login access to your workspace; a contact is a record of a person you deal with who may or may not have a login. Most users arrive on their own once you invite them (see Team invites); this tab is where you see and manage them once they're in.
What's on the screen
A toolbar sits above a table of users:
- Add User — a toolbar button that opens the new-user flow (see the step-by-step below).
- Search — a search box ("Search users by email…") that filters the list so you can find someone quickly.
- The users table — one row per user, each row exposing the columns described below with per-row Actions on the right.
The columns in detail
Each row is one platform user. The columns read left to right:
| Column | What it shows |
|---|---|
| The user's login email address — this is also what the search box matches on. | |
| Role | The user's account role — this is the access tier (see the box below). Editable inline from this column. |
| Type | The account/professional type of the user. |
| Subscription | The user's subscription tier (free, pro, …). |
| Credits | The user's current credit balance — what the account has left to spend. |
| Status | The account status (e.g. active). |
| Actions | Per-row actions to manage the user. |
The account role = the access tier
A user's account role is now the single thing that decides what they can do across the platform. Set it here (the Role column is an inline dropdown). There are six tiers:
| Role | What it grants |
|---|---|
| User | A standard team member — the baseline; access falls back to their workspace membership. |
| Sales | The Sales portal and their own customers (no finance back-office). |
| Supplier | The full supplier business node and its downstream (this replaces the old dealer and factory roles — both now map to Supplier). |
| Architect | Sells to end clients with their own downstream. |
| Finance | The full Finance module, including expense approval. |
| Admin | Workspace administration (replaces the old super admin). Platform-operator “see everything” is reserved and not granted by this role alone. |
Filters. The toolbar has Any role, Any status, Any plan and Any type dropdowns to narrow the list, plus the email search box.
How to search
Type into the Search users by email… box at the top of the tab to filter the table down to matching users. It's the fastest way to jump to one person in a long list — search on their login email.
How to add a user
- Open CRM from the top navigation and go to the Users tab.
- Click Add User in the toolbar to open the new-user flow.
- Provide the user's details and choose their role — the role decides which areas of the platform they'll be able to reach.
- Save / create the user.
- The new user appears in the list, where you can read their role, subscription tier, credits and status at a glance, and manage them via the per-row Actions.
What the per-row Actions do
Each row carries an Actions control at the right end — the per-row way to manage that user (for example to adjust their account from the list rather than navigating away). Use it on the specific user whose role, subscription or status you need to change.
What this affects elsewhere
This tab decides who can log in and, through each user's role, what they can see and do platform-wide:
- Role is the access tier. The role you set here is the primary driver of what a person can reach platform-wide — CRM, Finance, Sales, supplier/architect surfaces, and so on (per the six tiers above). It's changed inline, and takes effect for that user.
- Invites land here. When you invite a colleague via Finance → Settings → Team, they sign up with the role baked into the link and then appear in this Users list, where their role and subscription are managed.
Changed in 2026-06: roles were consolidated — dealer and factory merged into Supplier, and super admin into Admin — and the old auto-populated “Dealer/Factory Accounts” role categories were retired. Old records still display with the new label.
Worked example — onboarding a supplier. You've sent an invite link from Team; once they sign up they appear here in the Users tab. Use the email Search to find them, confirm their Status is active, and set their Role to Supplier from the inline dropdown — that grants their supplier business node immediately, no further list-keeping needed.
Users are one of the four CRM tabs — for the people and organisations you do business with, see CRM (Contacts, Companies and Categories). To invite a new person into the workspace, use Finance → Settings → Team; for what each role can do, see Getting Started → Roles & access.