Settings · Team
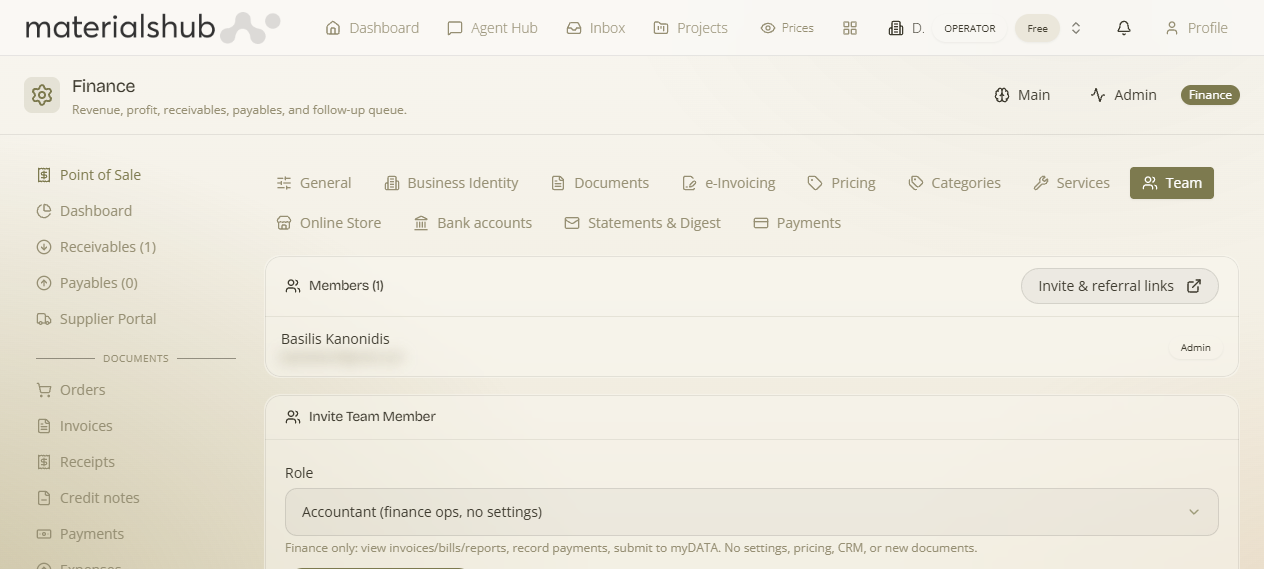
The Team section does two jobs: it shows everyone who already has access to this workspace, and it lets you invite new people by generating a sign-up link tied to a specific role. There are no passwords to set and no seats to buy — you pick a role, generate a link, and send it.
Where it is
Top navigation → Finance → Settings tab → Team (in the row of settings sub-tabs). If the row is crowded, Team sits between Services and Online Store.
What's on the screen
Two stacked areas, top to bottom:
- Members (N) — the list at the top. Each row is one person who can access the workspace, shown by their email (or a short account id), with a role badge on the right — e.g. Admin or Member. This is your at-a-glance "who has access" list.
- Invite Team Member — the panel below, where you create an invite: a Role dropdown, a one-line description of the role you've picked, and a Generate invite link button.
The roles you can grant, and exactly what each can do
Open the Role dropdown and you get three choices. The grey line directly under the dropdown updates to describe whatever you select, so you can confirm the access before you send the invite:
| Role | What that person can do (the exact text shown under the dropdown) | Pick it for… |
|---|---|---|
| Accountant (finance ops, no settings) | "Finance only: view invoices/bills/reports, record payments, submit to myDATA. No settings, pricing, CRM, or new documents." | A bookkeeper/accountant who reconciles and files but shouldn't change configuration or see customers. |
| Sales rep | "Sales portal — create quotes/orders for customers. No finance or settings." | A salesperson who should live in the Sales portal and raise quotes, but never see the books. |
| Member | "Standard member access to this workspace." | A general colleague who needs normal day-to-day access. |
How to invite someone — step by step
- Go to Finance → Settings → Team.
- In the Invite Team Member panel, click the Role dropdown and choose a role (for example, Sales rep).
- Read the grey description that appears just under the dropdown to confirm it grants exactly the access you intend.
- Click Generate invite link. A small confirmation appears — "Invite link created · Copied to clipboard" — and the link itself shows under Share this link (valid 30 days), for example
https://app.materialshub.gr/auth?mode=signup&invite=3de8b9e3…. It's already on your clipboard; the icon button beside the field copies it again if you need it. - Send that link to your colleague by email or chat.
- They open it, land on the sign-up screen, create their account, and are added to this workspace with the role baked into the link. The link is valid for 30 days.
Worked example — adding a part-time bookkeeper. Open Team → set Role to Accountant (finance ops, no settings) → click Generate invite link → paste the copied link into an email to them. When they sign up they'll be able to open invoices, record payments and submit to myDATA — but the CRM, Pricing and Settings tabs simply won't appear for them, so there's nothing extra to lock down.
After they join
The new person appears in the Members list here with their role badge, and also in CRM → Users (where their role and subscription are managed). The role you chose controls which top-nav areas they can see across the whole platform — see Getting Started → Roles & access for the full mapping.
Note: the three roles above are the ones you can hand out from this invite panel. Higher-level roles such as Admin / Operator (which you'll see on existing members) are managed at the platform/CRM level, not granted through a self-serve invite link.