Projects · Other tabs
A project's detail page is organised into tabs that cover the work and its deliverables. This guide summarises the remaining tabs — the ones beyond Rooms and the Client View — in one line each, and shows how to bring teammates and clients into a project with an invite link.
Where it is
Top navigation → Projects → open a project to reach its detail page (/projects/:id). The tabs run across the project's detail page. The set you see depends on your role — some tabs are owner-only or shown only when their module is enabled, and shared collaborators get a reduced set.
What's on the screen — the tabs
Each tab on the detail page does the following:
| Tab | What it's for |
|---|---|
| Overview | A summary of the project — client, budget and deadline, status, key counts and a starting point. |
| Plan | The estimating engine owner-only — import a blueprint, enter measurements, and the plan prices itself (options, allowances, versions, quote/e-sign, material list, change orders). |
| Products | The products/materials gathered for this project owner-only. |
| Moodboards | The moodboards attached to the project. |
| Quotes | The quotes for the project. |
| Billing | Billing for the project owner-only. |
| Finance | Project-linked finance, when the Finance module is available — including the orders scoped to this project, so you see the deal money for this job alone. |
| Sheets | Presentation sheets across the project's boards. |
| Tasks | To-dos for the project. |
| Timeline | Activity history owner-only — kept private from clients. |
The two tabs covered in their own guides are Rooms (break the project down by room or area for organisation and budgeting) and the Client View (the client-ready deliverable, owner-only) — the headline capability the other tabs feed into.
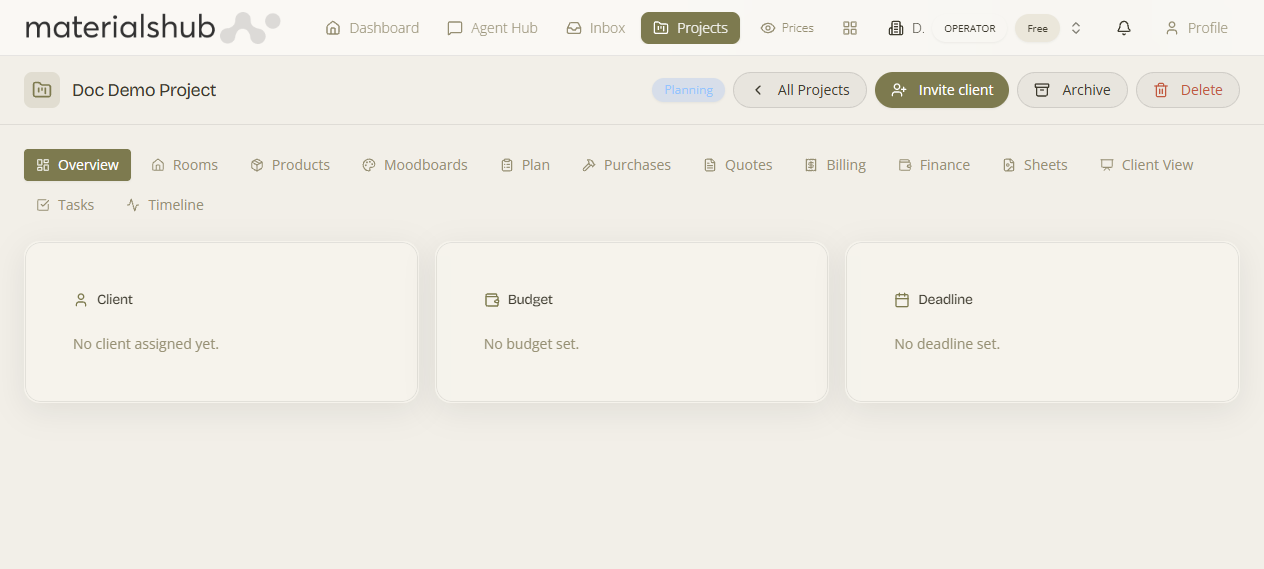
Inviting collaborators & clients
What it is — a way to bring other people — teammates or the client — into a project via an invite link (/projects/invite/:token).
Why it matters — projects are collaborative: you may want a colleague working alongside you in the same boards and quotes, or the client looking in on progress. Invitations let you do that without handing over your whole workspace — shared users see the project marked as shared and get a reduced set of tabs, so the owner-only tabs (Products, Billing, Client View, Timeline) stay private.
How to invite a collaborator — step by step
- Create an invite for the teammate or client you want to bring into the project.
- Share the invite link (/projects/invite/:token) with them.
- The invitee lands on a public landing page and accepts the invite after signing in, gaining access to the project.
What it affects: accepted invitees gain access to the project's non-private tabs and see it flagged as shared; the owner-only tabs remain hidden from them.
Worked example — bringing in a colleague. Create an invite for the teammate → send them the link at /projects/invite/:token → they open the public landing page, sign in, and accept. They now see the project's non-private tabs (Overview, Moodboards, Quotes, Finance, Sheets, Rooms, Tasks) marked as shared, while Products, Billing, Client View and Timeline stay private to you.
In short: the tabs keep a project's many moving parts separated but reachable from one place; Rooms and the Client View have their own guides, and invite links bring teammates and clients in with a reduced, owner-safe set of tabs.