Operations · Expense cards
Expense cards are how team members record out-of-pocket spend — a sales trip, a month of expenses, or anything else — attach receipts, and submit it to finance for approval. Finance reviews each line, and approved totals can post a reimbursement. This page covers both sides: filling a card in, and reviewing one.
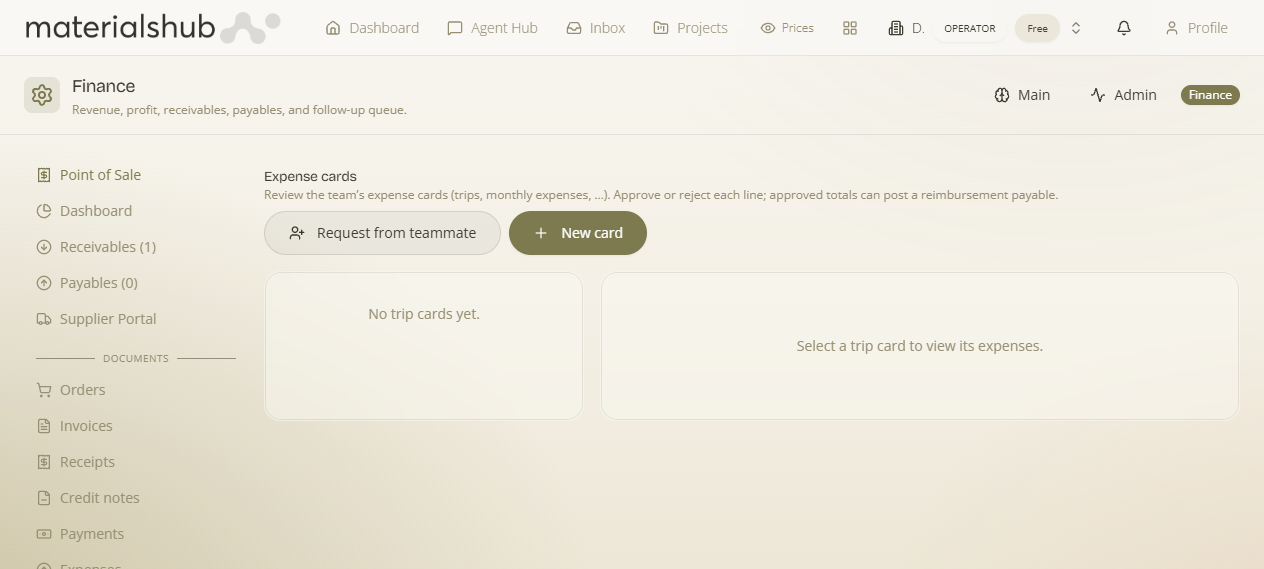
How to open it. Team members (any signed-in user): the Expense cards page at /trip-expenses — you see only your own cards. Finance reviewers: top navigation → Finance → the Expense cards tab — you see everyone's cards and can approve/reject lines. You can also drive the whole thing from the Agent Hub (see below).
What an expense card is
A card groups expense lines under one submission. It has a type, a few header details, and a status it moves through as it's filled in and reviewed.
| Card type | Use it for |
|---|---|
| Trip (default) | A single sales trip / client visit — has Destination + Trip start/end dates. |
| Monthly | A whole month of expenses collected on one card. |
| Other | Anything that isn't a trip or a month. |
Status lifecycle
| Status | Meaning |
|---|---|
| Draft | Being filled in — still editable. |
| Under review | Submitted to finance. |
| Partially approved | Finance approved some lines and rejected others. |
| Approved | All lines approved. |
| Rejected | Declined. |
Step by step: create and submit a card (team member)
- Open /trip-expenses (or, if you have Finance access, the Expense cards tab) and click New card.
- In New expense card, choose the Type (Trip / Monthly / Other), give it a Title (e.g. "Athens client visits — June"), and for a trip add Destination, Purpose, and Trip start / Trip end dates. Click Create — it opens as a Draft.
- Open the card and add expense lines — each is a single item (transport, hotel, meals, etc.) with an amount, a payment method, and a date. Attach the receipt to each line.
- When the card is complete, Submit it. Its status becomes Under review and finance is notified.
Step by step: review a card (finance)
- Open Finance → Expense cards — you see every member's cards (the accountant role can view but not approve).
- Open a submitted card; for each line, approve or reject it.
- Finish the review — the card becomes Approved, Partially approved or Rejected, and the submitter is notified with the approved/rejected totals.
- Approved totals can post a reimbursement payable so the person gets paid back (see Payables).
Request a card from a teammate (finance)
Finance can pre-create a card for someone to fill in — handy for "send me your Q3 tour expenses".
- On the Finance Expense cards tab, click Request from teammate.
- In Request an expense card: pick the Team member, choose the Type, set a Title / category (e.g. "Q3 client tour"), and add an optional Note to the team member (what the card is for / what to include).
- Click Request. A Draft card is created owned by that member, stamped with who requested it and the note; they get a notification with a link to add their expenses and submit. They'll see your note on the card.
Do it from the assistant
From the Agent Hub (JARVIS) you can run the whole flow in plain language: "create a trip card for the Athens visit" (or a monthly card), "add a €40 taxi expense", "list my expense cards", and "submit the card". See Tools & Capabilities.
Notifications (Flows)
Expense cards raise platform notifications through the Flows engine — there are three triggers an admin can build flows on:
- Expense Card Submitted — a member submitted a card for review (notifies finance).
- Expense Card Reviewed — finance finished reviewing (notifies the submitter, with approved/rejected amounts).
- Expense Card Requested — finance requested a card (notifies the assignee to fill it).
What it affects
- Approved cards feed a reimbursement into Payables.
- It's the finance counterpart to the Sales rep workflow — reps log trip costs while building orders for customers.
- How an approved card posts to the ledger is configured under Finance → Settings.