Apps & Modules
MaterialsHub is assembled from modules — self-contained capabilities you switch on per workspace. Rather than crowd the top navigation with everything, the optional ones live behind the App Launcher: each workspace turns on exactly the apps it needs (HR, Email Marketing, Docs, Flows, and more), and only those appear. This page explains the framework: where apps live, how you enable one, how paid add-ons and BYOK apps work, and how a member can request an app the owner controls.
Where: the App Launcher is in the top navigation (after Discover); the full /apps hub lists everything. You manage activation from either the launcher or Profile → Modules. Apps are enabled per workspace.
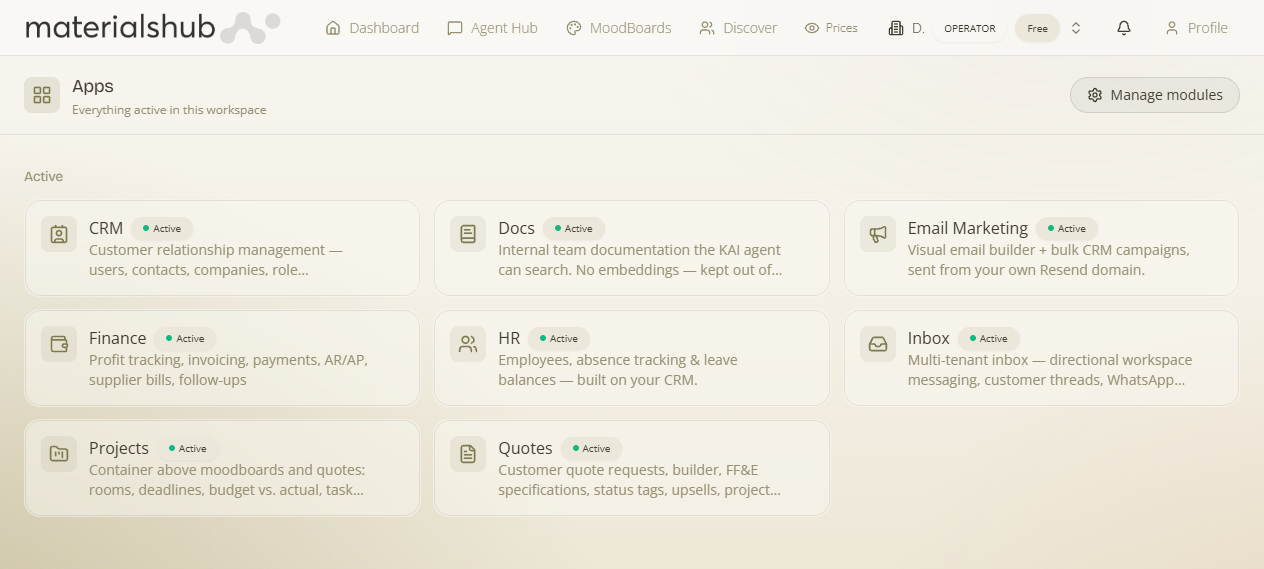
Active vs available apps
The launcher and the /apps hub split apps into two groups:
- Everything active in this workspace — the apps already switched on; click one to open it. (If none: “No apps active in this workspace yet.”)
- Available to add — apps you can enable. Each shows its name, an icon and a short description, plus an enable action.
An app only appears for a workspace when it's globally enabled on the platform and entitled to that workspace — that's what keeps each tenant's launcher to just its own apps.
Price tiers
Every app declares a tier, which governs how you get it:
| Tier | What it means |
|---|---|
| Free | Included — switch it on directly. |
| Pro / Enterprise | A paid add-on. Each is bound to a Stripe product, so enabling it goes through checkout/billing before it unlocks for the workspace. (Examples: HR, Email Marketing.) |
How to enable an app
- Open the App Launcher (or /apps) and find the app under Available to add.
- Click enable. A free app switches on immediately; a paid one takes you through checkout (it's tied to a Stripe product) and switches on once billing is set up.
- The app moves to active and its screens, tabs and tools appear for that workspace. You can also manage activation from Profile → Modules.
Requesting an app (members)
Enabling a paid app is an owner action (it commits spend). If you're a member, you can request an app instead: the owner is notified (a module-access-requested event flows through Flows) and can approve it, after which you get access. This routes the “I need this capability” to the person who authorises it, cleanly.
BYOK apps — bring your own key
Some apps run on your credentials, not the platform's — “bring your own key” (BYOK). Enabling the app is only step one; the app won't actually do its outbound work until you add your own key/account. Two examples in this guide:
- Email Marketing — BYOK-only: campaigns send exclusively from your own verified Resend account. No shared platform sender.
- HR → Ergani — files to the Greek labour authority (ΠΣ Εργάνη) using your Ergani Web API credentials.
BYOK credentials are added per workspace under Profile → Keys & Connections (or in the app's own setup card). Each BYOK app's page below documents exactly what to add and where.
The apps
HR
Employees, attendance, time-off, payroll, recruitment, documents, Ergani filing — a full HR suite.
Stock Management
Multi-warehouse inventory, movements, counts, AI resupply, ShipsGo tracking (BYOK) & freight quotes.
Contracts & e-Signature
Signable agreements across HR, Finance & Projects, with a public e-sign page + audit trail.
Reviews & Ratings
Product & profile reviews — star ratings, verified-purchase badges, owner replies, AI summaries (free).
Email Marketing
Visual email builder + bulk campaigns to CRM audiences — BYOK Resend.
Flows (Automations)
Workspace automations — notifications, emails and actions, metered from your credit pool.
Team Docs
An internal Markdown wiki the assistant can search — with propose-and-review editing.
Manage modules
The Profile → Modules tab: activate, purchase and request modules per workspace.
In short: the App Launcher is your workspace's control panel of capabilities. Free apps switch on instantly; paid ones go through Stripe; BYOK ones also need your own key. Members request, owners approve.